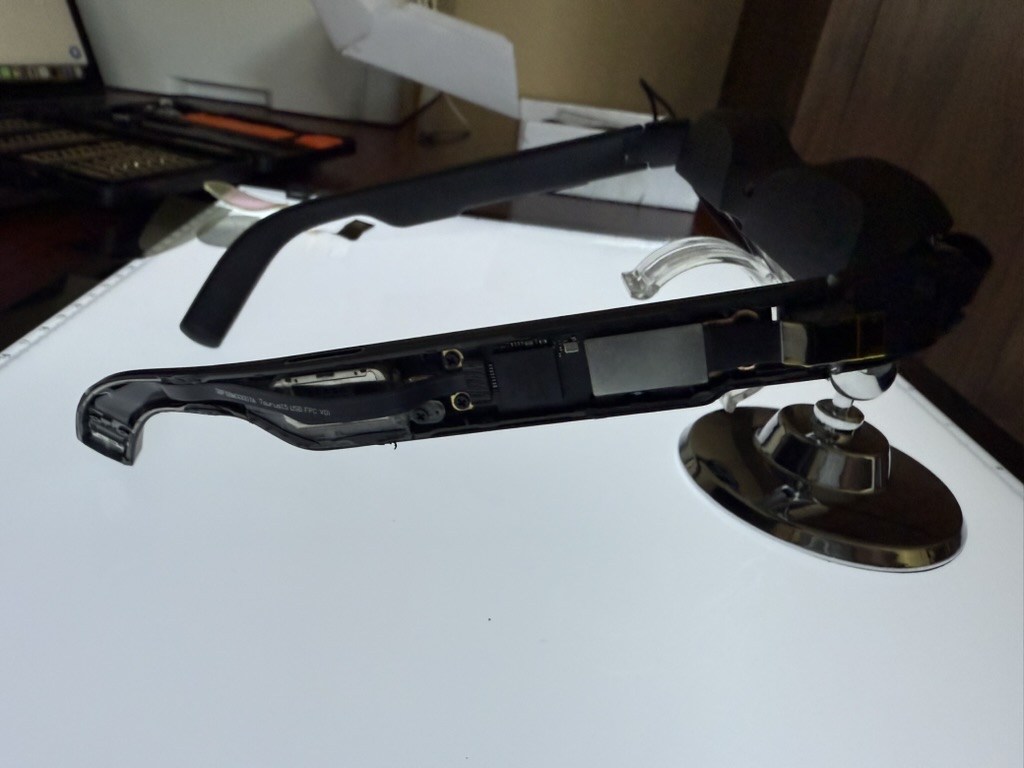
While we’ve already looked at the Air 3S’ optics here, given the extensive teardown we had to do to access the lens and display modules I thought it was prudent to take a look at all of the other components that make up the glasses.


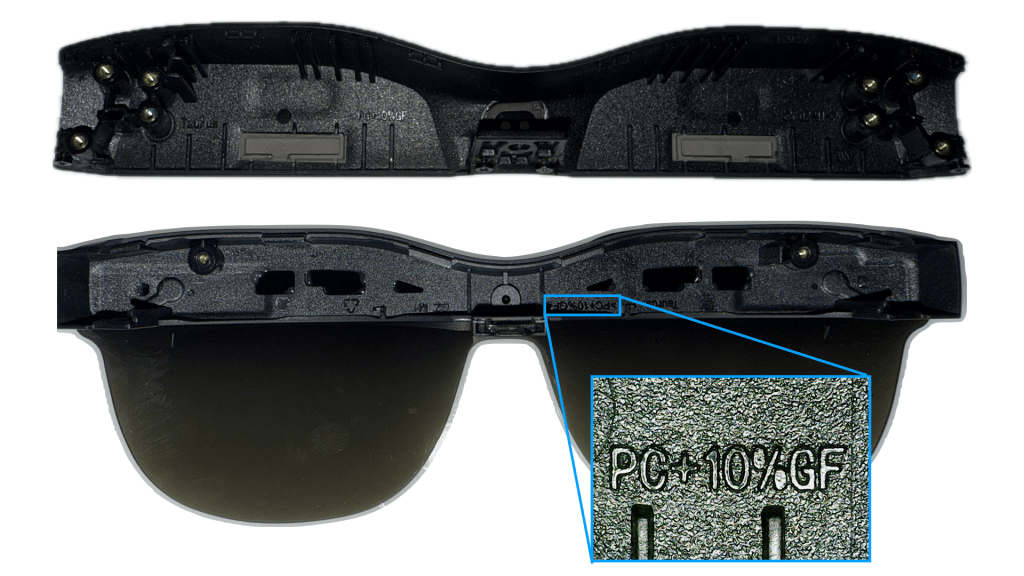
To start, we can take a look at the outer lens plate, which provides the protection for the optomechanical elements in the birdbath module. There’s not much to say about this portion of teardown other than it’s interesting to see that the body is not ABS as I expected. Instead, RayNeo seems to be using a PC+10%GF (Polycarbonate with 10% glass fiber) as the body – not very important from an end user perspective, but it is a more premium material for a component that likely could be further cost-downed by going to pure ABS. Thermal conductivity of the materials are similar, so not sure why the choice for a more premium resin.

Next we take a look at the optical module – on top of the module we have the middle logic board which sits on top of the plastic housing that surrounds the optical module components. Since we’ve already discussed the optical components, let’s take a look at the logic board and proximity sensor.

Here we can start seeing some more interesting internal component choices, and some flavor text on the PCB: seems like the internal code-name for this project was ‘Taurus’! We have lots of various connectors for the display modules, the flex connectors to both the left and right temples, and many more commodity components – one notable choice is the onboard microcontroller. While the headset isn’t doing any heavy computation, there is still need for processing the various inputs from the user and controlling the audio and display functionality – that’s what STMicro’s 32U0 Ultra Low Power microcontroller is for.
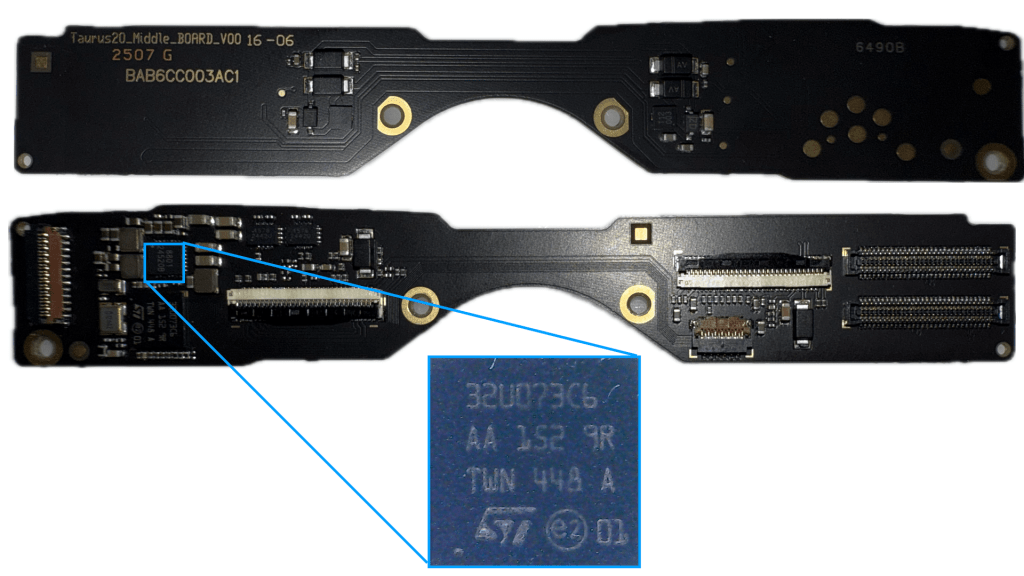
The proximity sensor also connects into this PCB, and uses a single ToF module to detect whether the headset is being worn – a nice feature to help turn off the displays if you ever take off the headset and reduce battery drain, albeit still around 1W…

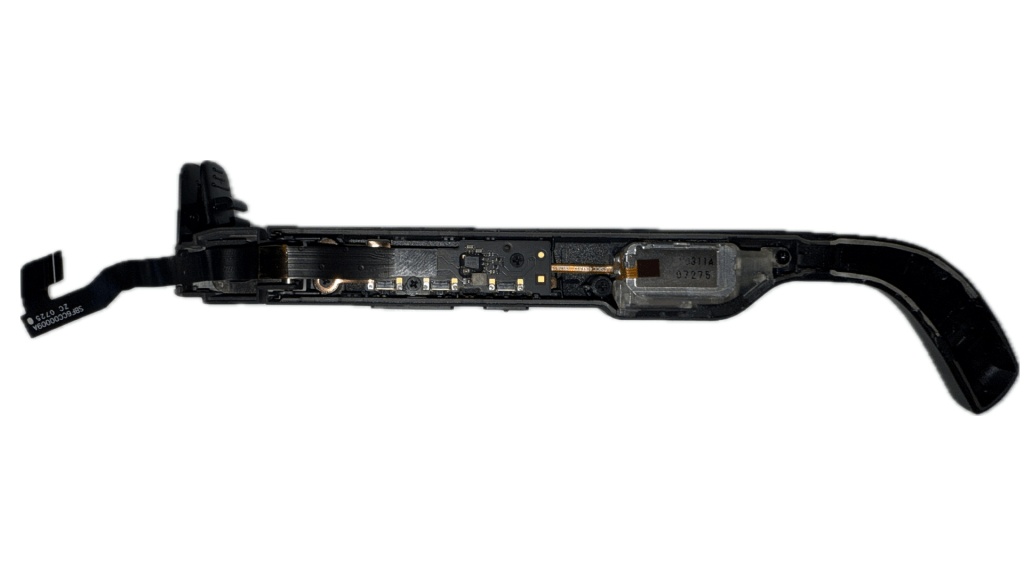
Next, we look at the right temple of the glasses – this is the where we have both the USB-C power & data input that will drive our dual microOLED displays, along with the display driver chip (DDIC) and connector flex to the middle logic board.
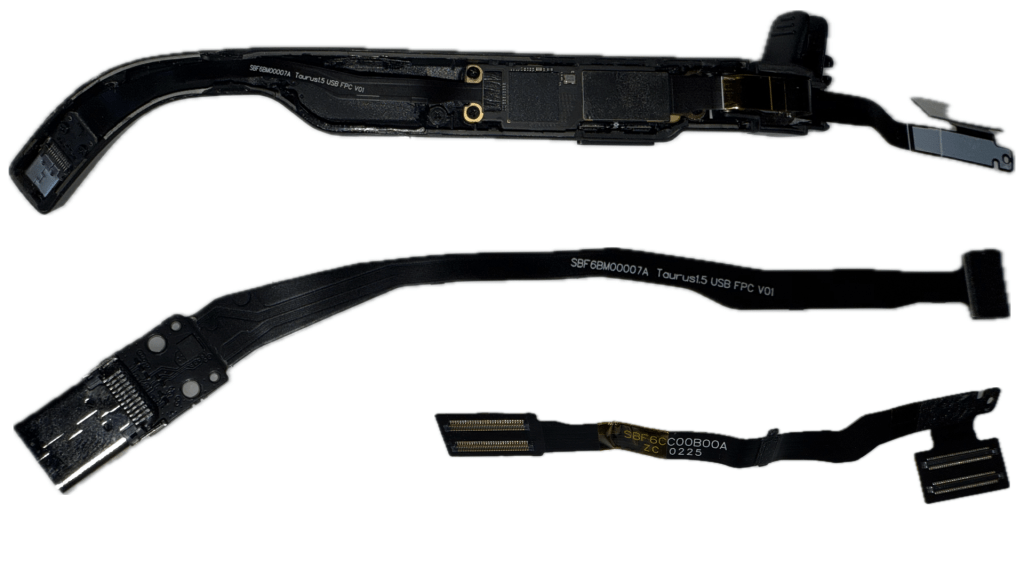
The DDIC is from a fabless company I haven’t heard of before called Lontium based in Hefei. While not a well known DDIC provider (at least to me), it seems they are aggressively pursuing microdisplay applications so I suspect we’ll see them around in more of these teardowns.

The audio modules are connected via 3 simple pogo pins – since it’s my first time seeing these speaker modules, I also wanted to tear one and see the construction – it’s surprisingly simple, with two copper coils on either side of a suspended magnetic core. The energized coils simply push or pull the magnet in the cavity and compress the air inside, resulting in the audio output we hear from each temple. Pretty cool – can’t wait to see the bone conduction version in other headsets as well!

Once all of the components are removed, the remaining stalk still has the push buttons and some thermal pads left inside. Looking at the material used for these stalks, we have a much more flexible PC+TPU (polycarbonate + thermoplastic polyurethane) which is likely chosen to make a more comfortable fit for the wide range of head sizes this device has to accomodate.

On the left temple, we have one final logic board and the left speaker module.
While the we don’t see too many interesting components, there is a white water-sensitive sticker here that will indicate if the unit was exposed to moisture. It’s interesting that these are on the temple boards, but not the middle board – likely your display connectors will be corroded if there’s water condensing in that section, so the moisture indicator may not be as critical.

We end on a simple, but incredibly important component for smartglasses – the hinge mechanism. These are very sturdy, likely stainless steel, components that help lock the frontplate in 3 separate positions and you can feel how much force is required to torque these into each of those 3 positions. There’s not much to cover about these hinges other than the obvious pinch-point free design that we have to have to prevent the flex cables from getting damaged when you fold the glasses – there’s quite a bit of innovation here from all the major manufacturers, so it will be interesting to see the mechanical design evolve here in the future!

If there’s anything I missed in this teardown that you want to know more about, let me know in the comments below and I’ll see if we can update this further or at the least make sure to include it in our future teardowns.

Leave a comment