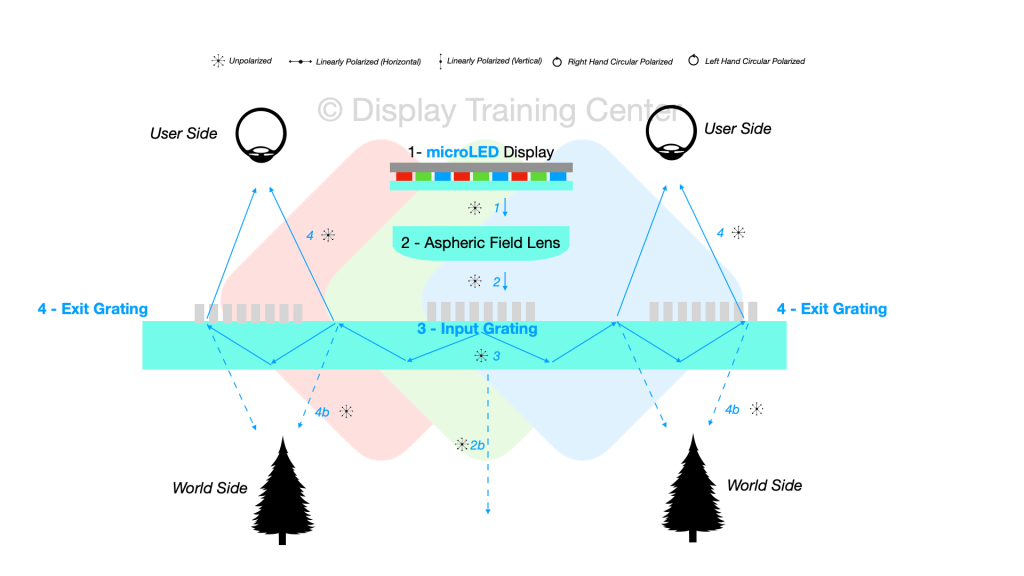
The Rokid Glasses kickstarter campaign was by all accounts a great commercial success, and they can count my own contribution among the folks around the world who wanted to see these glasses launched. While the ChatGPT integration for on-device assistance, translation, and more is probably the most touted feature of this device category, I was very interested to see the biocular Optiark waveguide that uses a single microLED panel to deliver the image to both eyes. This cuts down on 1x display panel procurement, and from a consumer perspective we’ll be able to see cheaper devices in the long run.
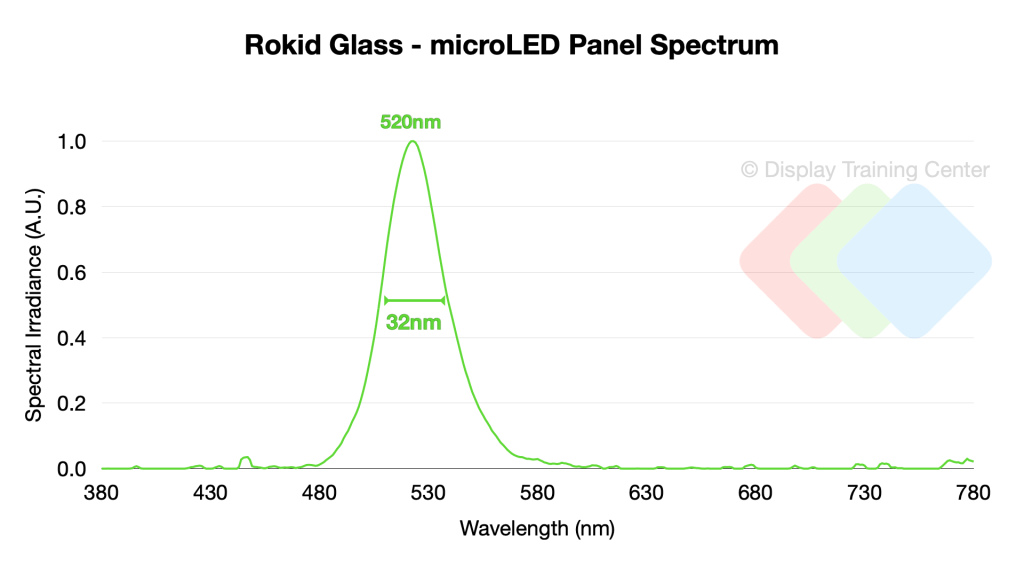
The display panel is not really a surprise here – Rokid chose to go with the well known (and essentially only supplier to the major brands) JBD Hummingbird 0.13″ display. Color purity wise, we get our expected green peak at 520nm with a very good 32nm FWHM, which is to be expected given the inorganic LEDs being used.
One thing I note in the video is the visible non-uniformity of the display pixels – it’s a poorly kept secret in the industry that microLED panels can have very noticeable pixel-level brightness variation, even after uniformity compensation algorithms and overall brightness reduction measures have been put in place. Since the majority of the UI is sparse in nature, you generally can’t tell unless you are at the minimum brightness setting (where even single pixel lines become noticeably non-uniform…) If you end up using the photo review feature, you can see how adjacent pixels that are equal captured brightness may get driven to a similar brightness, but appear noticeably different to the eye – see pixels 1 vs 2, and 3 vs 4. I know JBD has some newer panels with embedded demura options, but these seem to be the older panels where this isn’t the case…

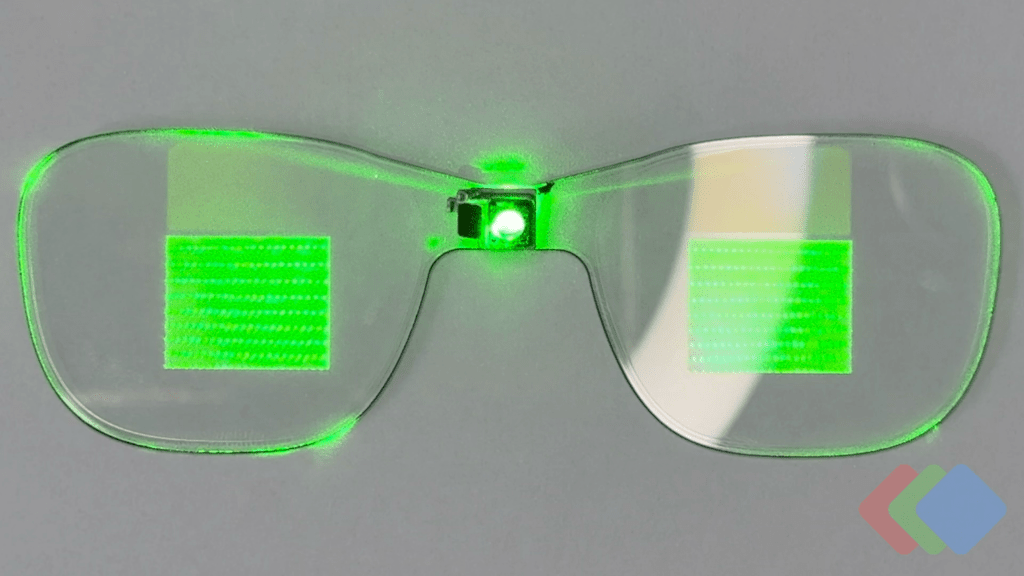
On the lens side, I love seeing the optical design in action with my green laser – while there’s plenty of nay-sayers out there about the challenges with this biocular design including an inability to have digital IPD adjustment, a more fragile device (now you need to replace both waveguides if one is damaged) and I’m sure many more I can’t recall at this time… it looks really cool!
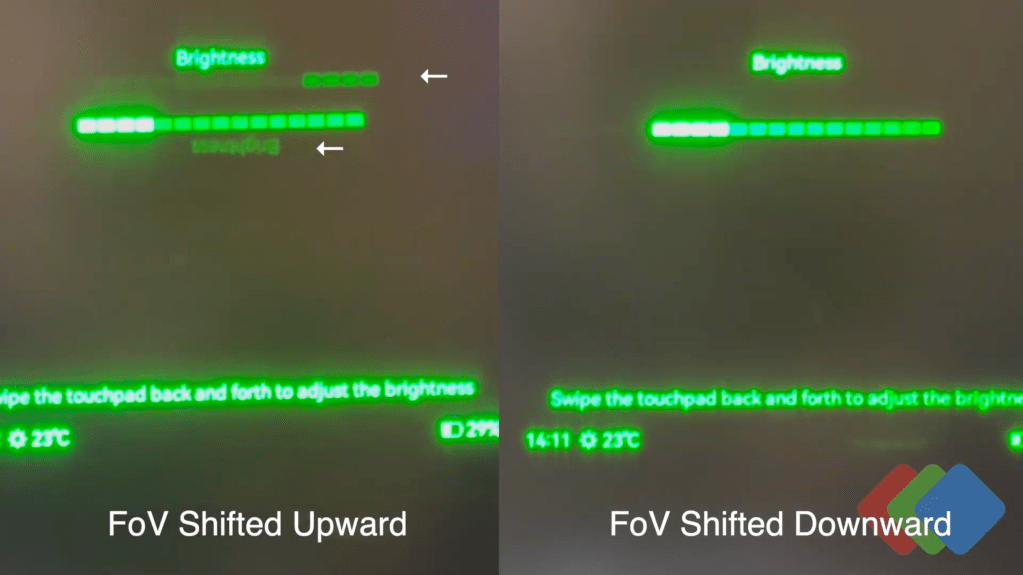
One issue I did find during testing was with the digital image location adjustment. What Rokid did great was reserve some of the vertical pixels use in the UI so that the entire image can be DC shifted either up or down to accommodate a larger eyebox depending on how the nose-pads sit on a user’s nose. At the extreme down-shift, the image is as expected – however if you shift the entire FoV up to the maximum allowed via software, there does seem to be a double image generated within the waveguide. You can see this in the brightness menu below where the brightness bar is at the top of the FoV, and they now create a mirrored & flipped second image noted by the white arrows.
Double-image aside, this design is very impressive and most importantly cost effective from a display panel perspective – what is still to be determined is whether the increased waveguide cost (since panelization is worse for these large ones vs. 2x small ones, as well as bigger yield hits when a waveguide is mis-printed…) offsets all the gains from fewer panels procured, fewer alignment steps, etc.
As always, all raw data collected and used here is available for all tiers of paid Patreon subscribers here: https://www.patreon.com/cw/DisplayTrainingCenter
Up next, we’ll go to SPIE and see all of the new components on display for next year’s headsets – stay tuned for a video soon!

Leave a comment